Showing posts with label My DIY projects and tutorials. Show all posts

September 20, 2015

DIY: How to Make A Simple Hair Pin

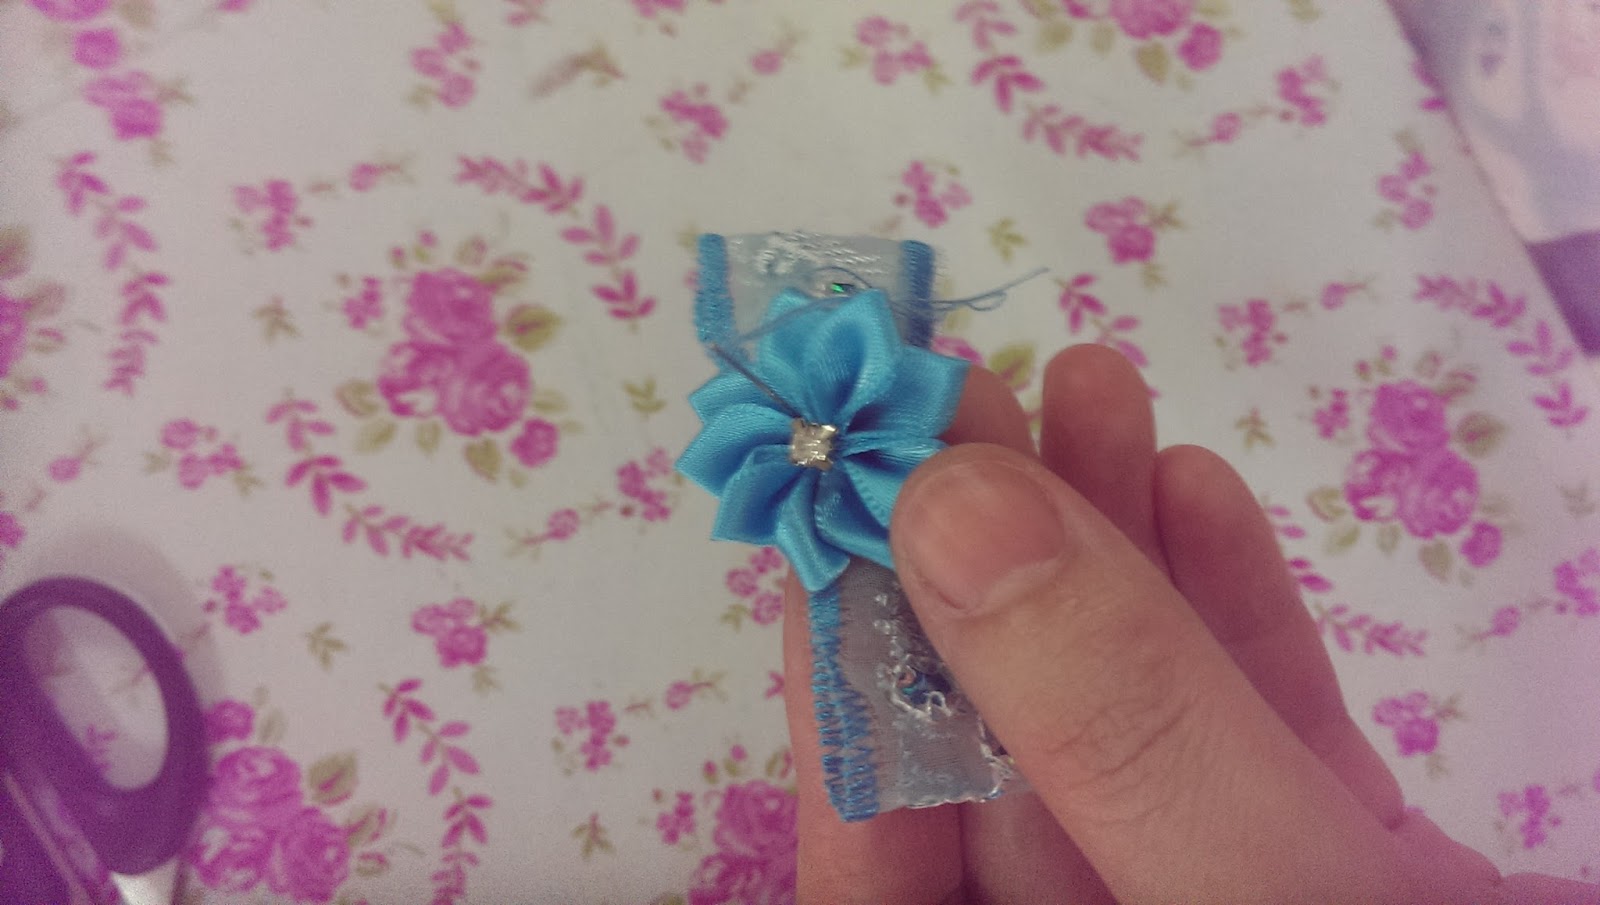
Hi, here just to show some simple steps to make a hair pin. You may want to make one for your little girl to match with any of her dress. Mine was for my girl to match with her blue Elsa dress!

Materials: A hair pin, a small ready made flower, a strip of ribbon/lace, a strip of matching ribbon, UHU glue, matching thread and a needle
Here is the pictures tutorial:


Enjoy!

August 8, 2015

DIY: How to Make Animal Soft Toys

Hi all, i love making something nice for my girls (handmade with love), especially when it's time when their special day...BIRTHDAY is approaching! I just need to spend my TIME!

Here, i would like share these handmade soft toys that i made for my 2 girls. The older one requested a bunny and the younger one asked for a kitty.

Materials: Fur fabric (size 40x45 cm), 1 cm ribbon (length 18 cm), felt (for eyes & nose), thread (black), poly fiber, UHU glue and a decorative flower (optional).

Here are the steps with pictures:
  1. Draw a picture of a bunny/cat on a piece of paper.
  2. Cut it out and place on the fabric. Make sure you fold the fabric to make it 2 layers so you will get 2 pieces. Please ignore the outer line on the paper, it's not seam allowance. I just tried to make it bigger.
  3. Pin it on the fabric.
  4. Get ready to sew with your machine. Sew along the paper edge slowly and carefully. I will recommend needle no.9 for a better result.
  5. Sew around it and leave a gap/hole about 6 cm.
  6. Then, cut it out with 0.6 cm allowance (refer picture 6).
  7. You will get bunny/cat figure as shown in picture 7.
  8. Turn it inside out through the hole.
  9. You will get a more perfect figure as shown in picture 9.
  10. Get ready some felts and cut out the eyes and nose. You may replace the eyes with wiggly eyes or buttons.
  11. Then, hand stitch the bunny/cat's whiskers and mouth with black thread. Stitch slowly as this is the tricky part as i stitch it starting from the inside, then continuously. So, make sure your thread is long enough.
  12. Now, you can stuff it with poly fiber. Fill the ears first, then head, body and tail.
  13. Apply some blush powder to make two pinkish circles on its cheeks. Your soft toy now is 98% done.
  14. Cut a strip of 1 cm ribbon, length around 18 cm. Put it around its neck and glue the end of the ribbon. And i glued a decorative flower to its ear. You may use a felt flower or a button.
  15. Done!
Enjoy :)


December 19, 2014

DIY: How to make a Christmas Hairband

Ho ho ho...Here is the 'Step-by-step guide on 'How to Make a Christmas Hairband'. And this is my early Christmas gift to all :)


Materials:
Scissors, acrylic felt (white & red), felt marker, needle, thread, glue (E6000 or UHU), black hairband and scallop scissors (optional).
Steps (with pictures shown below):
  1. First, draw 6 circles on the red felt (diameter: 6 cm).
  2. Cut them out.
  3. You will get 6 red circles. Put 2 of them aside.
  4. Take 4 of them. Fold it in half.
  5. Then, fold again.
  6. As shown in the picture.
  7. Using a needle and a red thread, sew it few times at the tip (holding all the layers) and make a knot.
  8. Repeat steps 4-7 until you get four petals.
  9. Now, get ready the white felt and draw a circle (diameter: 4.5 cm).
  10. As shown in the picture.
  11. Cut it out and put aside.
  12. Draw another white circle (diameter: 6 cm).
  13. As shown in the picture.
  14. Use a pair of scallop scissors and cut slowly at about 3 to 4 mm away from the circle. (If you don't have the scallop scissors, don't worry, you can always draw the wavy line and cut it carefully).
  15. Take the four petals (from no. 8), sew it onto the white scalloped-circle.
  16. Repeat for all four.
  17. Now, get the 2 red circles (from no. 3). Fold it in half.
  18. Fold it again, 1/3 to the front (as shown in the picture).
  19. Fold it again, this time 1/3 to the back (refer to the picture).
  20. You will get something like a 'S' shaped petal.
  21. Sew it at the tip, holding all the layers together.
  22. Then, sew it to the centre of the white scalloped-circle with the 4 petals (no. 15).
  23. Stitch it nicely at the centre and end it with a knot. Repeat steps 17-23 for the second petal.
  24. Now, you will get a nice red Christmas peony!
  25. Turn to the back.
  26. Apply some glue to it, make sure you glue the knot and the stitches.
  27. Place the black hairband to it, at the desired position. Hold it carefully for few minutes.
  28. Then, get the smaller piece of white circle (from no. 11) and apply some glue on it.
  29. Put it onto the back of the peony (no. 27). Press nicely and leave it for 10 minutes to let it dry.
  30. Now, your Christmas Hairband is DONE! Simple and nice, right?

Enjoy and Blessed Christmas!

October 3, 2014

DIY (Free hand): How to Make a Simple Bracelet

How to Make a Simple Bracelet Without Any Tools (Free Hand):

(This project is suitable for beginners or those who do not have any loom bands tools, but still want to try it out! You may use the normal rubber bands at home...)


  1. You need 10 purple bands and 10 pink bands for a simple bracelet. First, loop the pink band to your thumb and twist it to make a cross and loop it to your index finger.
  2. Take a purple band and loop it to both of your thumb and index finger.
  3. Now, pull the pink band up to the top, for both sides.
  4. The pink band will go the middle as shown in picture 4.
  5. Now repeat step 2 with a pink band.
  6. Next, pull the purple band up to the top as in step 3.
  7. The purple band will go the middle as shown in picture 7.
  8. Repeat steps 2-3 till you finish all the 20 bands.
  9. Now, place the s-clip to the end of the last band.
  10. Hook the other end to the same s-clip.
  11. Your simple bracelet now is ready!

Thanks to my dear daughter! She enjoyed it so much :)

DIY (Loom Bands): How to Make a Rainbow Flower Bracelet

How to Make a Rainbow Flower Bracelet:


  1. Get ready 5 sets of bands (5 petals for 1 flower) as shown in the picture. This bracelet needs 6 flowers, so you need 6 different sets of coloured bands. (If you want to make a longer bracelet, you may need 7-8 flowers). Get ready 6 extra bands and a s-clip.
  2. Loop the yellow band 3 times onto the 2 purple bands.
  3. Repeat the same step to get 5 sets (5 flower petals). Take the petal and loop it to the hook. You may use 2 hooks (I find it easier for me to transfer the petals to the single rubber band!).  Loop all the 5 petals to the hook.
  4. Now, transfer all the petals to the single (purple) rubber band. This the most challenging part..Do this slowly or you may need someone to assist you.
  5. Pull the 2 ends of the purple band and hook it to a pencil (temporary).
  6. Repeat steps 2-5 to get 6 colourful flowers. Hook them to the same pencil.
  7. After you have completed all the 6 flowers, take out a flower from the pencil and join the 2 ends of the band to make a knot.
  8. Join the flower to another flower using the same method in step 7, make a knot.
  9. Repeat step 8 for all the 6 flowers.
  10. Put a s-clip to the end of the band (the last flower).
  11. Hook the other end of band to the same s-clip.
  12. Now, your rainbow flower bracelet is done!

DIY (Loom Bands): How to Make a Flower Ring

How to Make a Flower Ring:

  1. Get ready the rubber bands as shown in picture. (Please add another purple band ya, i left out 1 in the picture!)
  2. Take 2 purple bands and 1 pink band.
  3. Loop the pink band 3 times onto the 2 purple bands.
  4. Repeat the same step to get 5 sets (5 flower petals).
  5. Take the petal and loop it to the hook. You can use the hook that comes together with the loom band set, or you may use your crochet hook if you have one!
  6. Loop all the 5 petals to the hook.
  7. Take a purple band and transfer all the petals to it. This the most challenging part..Do this slowly or you may need someone to assist you.
  8. Pull the end of the purple band and join it to the other end (on the hook) by making a knot.
  9. Pull the knot.
  10. Put on a s-clip.
  11. Take another purple band.
  12. Put it through the centre of the flower, pull it out to make a knot.
  13. Adjust the knot and make sure the flower is in nice shape.
  14. Hook it to the same s-clip.
  15. Now, your flower ring is done!

July 10, 2014

DIY: How to Print a Personalised 'Frozen' T-shirts

Hi there..Here you are! Personalised T-shirts for my girls :)

DIY printed T-shirts. Nice? Hehe..I'm happy with the result though my first time using this 'iron on transfer paper', hmm something unique right? Let me share how to use this so that more mums out there can try it out for their princes & princesses :)
  1. Firstly, get a white/light coloured plain cotton T-shirt. You can get this iron on transfer paper from some bookstores or craft suppliers (I still have few sheets with me, let me know if you are interested ya)
  2. Find a picture (e.g Frozen sisters or maybe Olaf if you have a boy!) Yes, you need a computer to do this. Save the picture & edit it before you print it.  (And I need my IT expert to assist me, my dear hubby TQ muacks!)
  3. Make sure you flip the image & wordings to mirror image before printing, so that the picture will turn out nicely when you place it on the shirt.
  4. Print out the picture, on the glossy side (I'm using an Inkjet printer).
  5. Let it dry. Then, cut it out and arrange it on the t-shirt (printed image facing the outer t-shirt).
  6. You can place a Teflon fabric on top of the 'iron on transfer paper ' to transfer the heat equally, or a sheet of A4 paper will do as well. Just make sure you apply the correct amount of heat, e.g cotton t-shirt, use cotton scale on your iron!
  7. Let it cool in room temperature, then peel off the paper slowly. Please don't peel it immediately or you may ruin the picture!
  8. One more thing, please do not re-iron again after peeling! The glue with stick to your iron & destroy the picture.
  9. When your DIY printed t-shirt is ready, please don't wash it straight away. To preserve the picture & its colours, please hand wash it the second day. And use plain water with no detergent for the first time! Wash it separately, gently and no brushing! This is not produced using a heat transfer machine, so you have to do all the necessary for a lasting nice DIY printed t-shirt :)
I'm happy to share this..bye for now!

DIY: How to Make a Lovely Pair of Home Slippers

Hi all, hope you enjoy all my writings..
Here, sharing time again...This time I want to show you how to make a lovely pair of home slippers for your loved ones!

Here you are:
I made these for my girls! One kitty face and another one Bunny face...And they wear it almost everyday :)

What you would need: A pair of slippers (you can buy it, but I will suggest that you use whatever that you have at home! A pair of hotel slippers will do! 3R: Reduce, Reuse & Recycle), fabric pen, scissors, paper, craft felt, felt glue, wiggly eyes, thread & needle. And of course you need some time..remember, everyone needs a hobby :)
  1. Firstly, get ready your slippers. Make sure the surface is clean.
  2. Now, drawing time. Explore your creativity here, maybe draw your child's favourite animal or cartoon character, but just the head!
  3. When you are satisfied with the picture. Carry on to the next step...Trace a copy of it on another paper. (Sorry not shown in the picture). Then, cut it out, piece by piece. All the parts.
  4. Now trace all the pieces onto the felt. Choose your colours.
  5. Then, cut them out, piece by piece.
  6. You may arrange all the parts now.
  7. When you are satisfied with the cut-outs, start to glue it down.
  8. Now, use a fabric pen to draw the outlines of certain parts that need to be sewn later on.
  9. Sew it using a suitable thread & matching colours.
  10.  Lastly, glue the finished animal head onto the slippers. Done!
Thanks for viewing...you can give it a try. I hope to create more 3R DIY projects in the future...


DIY: How to make fabric flowers

Hi all, mummies..and dadddies. Hehe! Ah..sharing time. I had made these fabric flowers quite sometime ago. If you are the fans of 'FlowerloiCrafts' page on Facebook, you will notice that :)

It is an easy peasy project. I guess for those who are already well-versed in sewing, you will be very familiar with it. For the beginners/young crafters, it will be a fun project to do! Yeah, i intend to teach my girl soon. You only need some fabric scraps, so next time don't throw away your fabric scraps.
  1. Firstly, draw 4 circles (diameter around 3.5-4.0cm) on the chosen fabric scrap. You can use a fabric pen to draw if you have one, if not a pencil will be fine, but trace gently. Or you may use a bottle cap to get your desired size.
  2. Then, cut out all the 4 circles.
  3. You will get 4 round circles of fabric.
  4. Fold the circles into half.
  5. Then cut it. Now you will have 8 pieces of halved-circles.
  6. Then fold the halved-circles again and sew it with a sewing machine. Please refer to the picture.
  7. Now you will get 8 pieces of folded quarter circles...Haha, hope you understand my language!
  8. Turn them inside out.
  9. Get ready a needle & a thread. Then sew it as shown in picture.
  10. Sew all the 8 pieces together and you are almost done!
  11. Lastly, you can embellish it with a coloured button. Sew it on & it is all done :)
Hmm, you may use this little daisies to decorate your blouse, bag or make a hair clip for your daughter! Hope you can try it and remember to share with me if you wish to. Thanks for viewing. Bye...