September 20, 2015

DIY: How to Make A Simple Hair Pin

Hi, here just to show some simple steps to make a hair pin. You may want to make one for your little girl to match with any of her dress. Mine was for my girl to match with her blue Elsa dress!

Materials: A hair pin, a small ready made flower, a strip of ribbon/lace, a strip of matching ribbon, UHU glue, matching thread and a needle
Here is the pictures tutorial:


Enjoy!

'Mum-made' Elsa Dress

Hi, I designed and made this Elsa dress some time ago for my girl. Ya, another birthday gift for her. It took me almost a month to finish it, without any pattern! I used my own imagination and at the same time tried to meet her requests. But at least I got one of her old dress as a guide for the measurements. Still learning day by day to sew a better dress. It was really a labor of love. So much time spent and effort in it. But no words could explain my satisfaction when I see her wearing it with her happy face :)
Here's the picture:

September 11, 2015

Easy Spring Rolls/Popiah Recipe

Easy Spring Rolls/Popiah Recipe (3-4 persons) 

My children and husband love home made spring rolls/popiah. A simple and healthy dinner for my family! Here's the simple recipe that i modified from my mum's version...usually i will cook this after a tiring day of sewing :)

Ingredients:
  • 10-12 popiah skins (i use spring roll pastry as shown in the picture below)
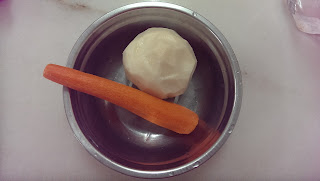
  • 1 medium sized 'sengkuang'/turnip (peeled and shredded)
  • 1 carrot (peeled and shredded)
  • some vege/lettuce (i use green & red coral salad)
  • 1 big onion (cut into pieces)
  • 1/4 cup of chicken (cut and marinated with soy sauce)
  • 2 eggs (fried and cut into small strips)
  • 1 tablespoon of soy sauce (i use Japanese shoyu from AEON)
  • 1 teaspoon of sugar
  • some cooking oil
  • some chilli sauce & ketchup
  • some mayonnaise
Steps:
  1. Get ready the popiah skins. If you use frozen spring roll pastry, take it out 20 minutes earlier and let it thaw in between a piece of dry kitchen towel. This will keep it moist at room temperature.
  2. Heat the pan with some cooking oil. Add in the onions and marinated chicken. Stir fry for a few minutes or until fragrant. Then, add in the shredded turnip and carrot. Stir fry for about 10-12 minutes.
  3. Add soy sauce, sugar and white pepper (optional). Stir evenly and then place it in a bowl.
  4. Fry the eggs and cut into small strips.
  5. Get ready the vege, chilli sauce, ketchup & mayonnaise before you start wrapping the popiah.
  6. Wrap the popiah. (steps are shown in pictures below)
  7. Done!
Preparation time: 20 minutes
Cooking time: 15 minutes
Enjoy!


August 8, 2015

DIY: How to Make Animal Soft Toys

Hi all, i love making something nice for my girls (handmade with love), especially when it's time when their special day...BIRTHDAY is approaching! I just need to spend my TIME!

Here, i would like share these handmade soft toys that i made for my 2 girls. The older one requested a bunny and the younger one asked for a kitty.

Materials: Fur fabric (size 40x45 cm), 1 cm ribbon (length 18 cm), felt (for eyes & nose), thread (black), poly fiber, UHU glue and a decorative flower (optional).

Here are the steps with pictures:
  1. Draw a picture of a bunny/cat on a piece of paper.
  2. Cut it out and place on the fabric. Make sure you fold the fabric to make it 2 layers so you will get 2 pieces. Please ignore the outer line on the paper, it's not seam allowance. I just tried to make it bigger.
  3. Pin it on the fabric.
  4. Get ready to sew with your machine. Sew along the paper edge slowly and carefully. I will recommend needle no.9 for a better result.
  5. Sew around it and leave a gap/hole about 6 cm.
  6. Then, cut it out with 0.6 cm allowance (refer picture 6).
  7. You will get bunny/cat figure as shown in picture 7.
  8. Turn it inside out through the hole.
  9. You will get a more perfect figure as shown in picture 9.
  10. Get ready some felts and cut out the eyes and nose. You may replace the eyes with wiggly eyes or buttons.
  11. Then, hand stitch the bunny/cat's whiskers and mouth with black thread. Stitch slowly as this is the tricky part as i stitch it starting from the inside, then continuously. So, make sure your thread is long enough.
  12. Now, you can stuff it with poly fiber. Fill the ears first, then head, body and tail.
  13. Apply some blush powder to make two pinkish circles on its cheeks. Your soft toy now is 98% done.
  14. Cut a strip of 1 cm ribbon, length around 18 cm. Put it around its neck and glue the end of the ribbon. And i glued a decorative flower to its ear. You may use a felt flower or a button.
  15. Done!
Enjoy :)


July 24, 2015

Shitake Mushroom-Potatoes Soup Recipe

Easy Shitake Mushroom-Potatoes Soup Recipe (4-5 persons) - Non Dairy


Benefits of Shitake mushrooms: Rich source of iron and good for cardiovascular system! And low in calories and high in B vitamins.

Ingredients:
  • 3 potatoes-medium size (cut into small cubes)
  • 1 cup fresh Shitake mushroom (cut into small pieces) - i bought from Tesco
  • 1/2 big onion (cut into tiny pieces)
  • 4-5 cups of water
  • A pinch of Italian herbs
  • A pinch of salt
  • 1/2 teaspoon of Maggi seasoning (Cukup Rasa)
Steps:
  1. Cut the potatoes, onion and Shitake mushroom into small cubes/pieces. (The smaller the cubes, the shorter the cooking time.)
  2. Now, place all the potatoes and onion cubes in a pot and add in 3 cups of water.
  3. Boil for about 15-20 minutes or until soft. Then, add in Shitake mushroom and continue to boil for another 10 minutes.
  4. Put it aside to let it cool for 15-20 minutes.
  5. Now, get ready your blender and pour in the mixture. Blend it till puree state.
  6. Pour the blended mixture into the pan. Then, add in 1 cup of water (you may add more water if you want to, but I prefer thick soup!) and stir it.
  7. Heat it again.
  8. Then, add in salt, Italian herbs and Maggi seasoning. Stir it.
  9. Your Shitake mushroom-potatoes soup now is ready!
Preparation time: 10 minutes
Cooking time: 45-50 minutes
Enjoy!

More pictures here:


July 11, 2015

My Mum

I really miss my mum...i love her very much...one of my dearest ones in this whole wide world. She was the one that would cry with me, encourage me and hug me when i needed her. She is not in this world now. She was called home to be with the Lord on 5th May 2015. An unforgettable day in my life. Yes, i have had to accept this fact, though it was so bitter and heart breaking.

I tried to be more focused to carry on with my life without her, sometimes by doing my sewing and craft items...but in the midst of it, i still miss her presence. Life still goes on. But i know...every day, i will think of her. I think it is normal, because i really miss her. It's like just yesterday, i was still talking and doing things with her together. Mum, you will always be on my mind. I thank you for all the things that you had done for us, dad, your children, your grand children and family.
Forever remembered, forever missed!

Psalm 23:6
Surely goodness and mercy shall follow me all the days of my life; and I will dwell in the house of the Lord for ever.


Remember to spend more time with your loved ones, not only your own family members, but parents and grandparents! God bless.

June 25, 2015

June Flowers 2015

Hi, i'm back..back again to jot and share something, since Christmas last year! Now already end of June 2015. Time really flies... and so many things had happened.
Here, to begin my article of 2015, I would like to share some beautiful flowers, from Penang Hill, Malaysia.